
Not all real estate investing is sunshine and rainbows. And quite frankly, not much of it is!
This week I’m sharing a quick story of a property I bought ‘as is’ and the unforeseen issues we ran into.
When you’re looking at a property to potentially purchase, it’s easy to get caught up in the moment and overly excited to buy something—at least I do. And when that happens, you tend to overlook things.
In this case, I overlooked a big thing: a sizable foundation crack.
How Did This Happen?
Here are a few pictures of what the property looked like when I initially saw it.
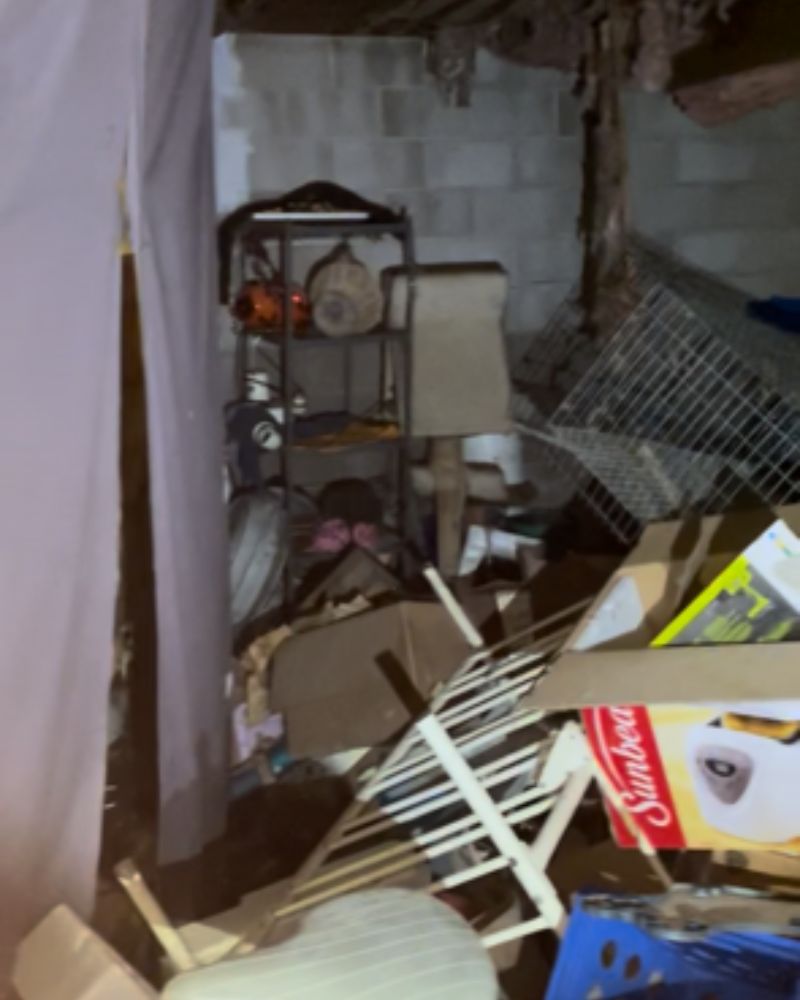
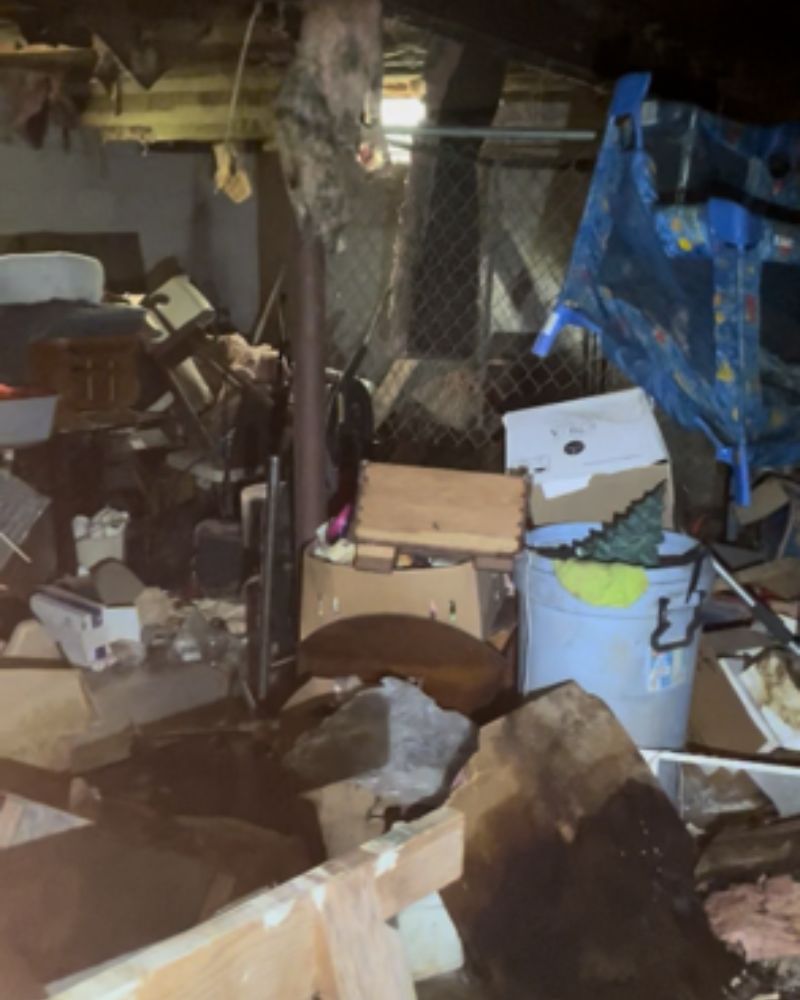
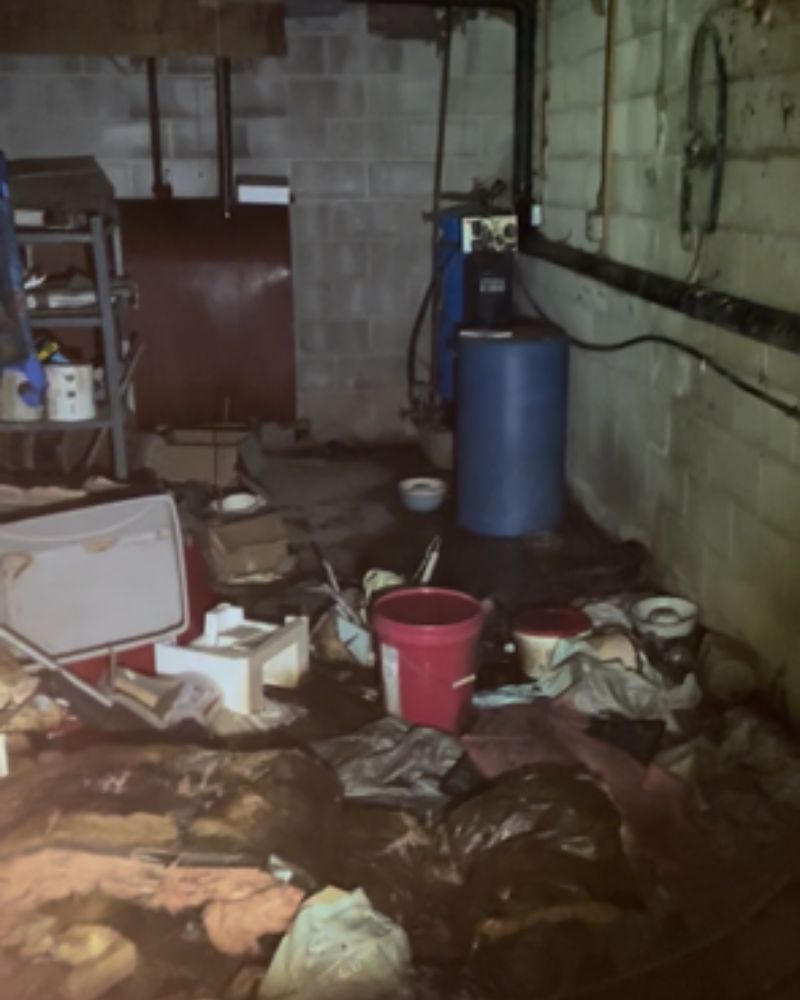
As you can see, it was nothing short of disgusting. The basement was so cluttered you couldn’t see the walls. Boxes, garbage, and shelving filled almost the entire space. There was so much stuff that it wasn’t possible to move things away from the wall, because the entire space was filled. There simply wasn’t anywhere to put it. The lighting was poor, and even with a flashlight, you could only see so much because of all the trash. Water was on the floor. It smelled like hell. Overall, the basement was gross (as was the rest of the house) and after I walked around as much as I could manage, I left, and unfortunately, I didn’t see the foundation crack. It wasn’t discovered until after the clean out of the basement, which took multiple days and dumpsters, and was of course after the as-is purchase.
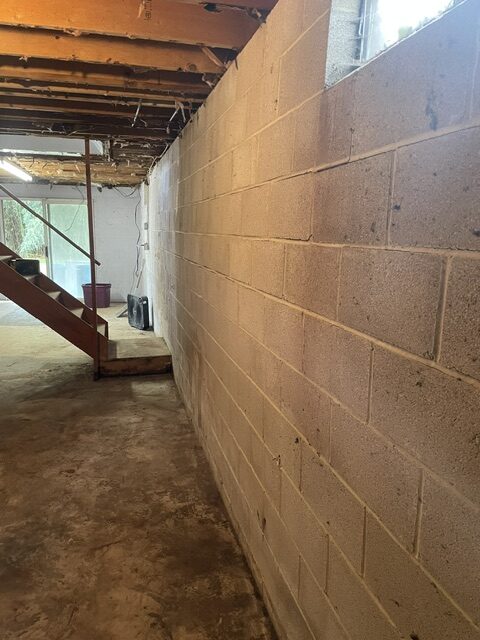
Once the basement was finally emptied, the problem became obvious.
A horizontal crack ran across the concrete block foundation wall.
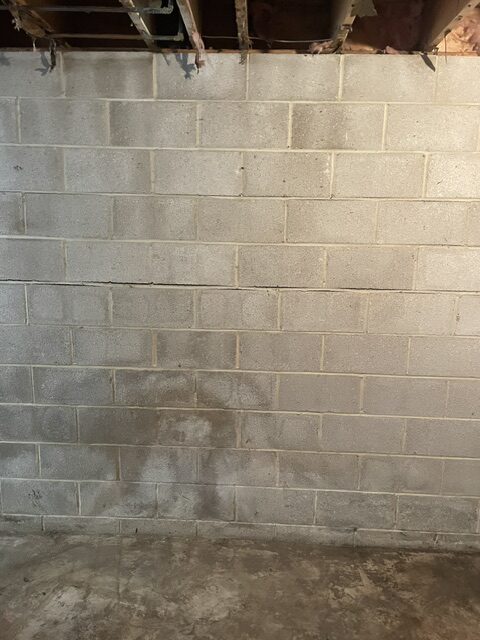
In my experience, the worst type of foundation crack in your concrete block is a horizontal one. And that’s what this was. These types of cracks are typically caused by pressure building against the outside of the foundation wall, resulting in the wall bulging inward and cracking horizontally.
The Solution
I hired a foundation professional to look at the crack and assess the situation. Long story short, we were able to resolve the issue. We dug out and exposed the entire foundation wall on the side of the house with the crack. Then we installed temporary support braces in the basement to provide stability while work was done. We drilled holes into the foundation block where additional rebar was pinned to support the wall. Through those holes, we poured additional concrete into the block to reinforce the wall. And finally, we re-waterproofed the exterior of the foundation, installed a new drain tile, and backfilled and regraded the space.
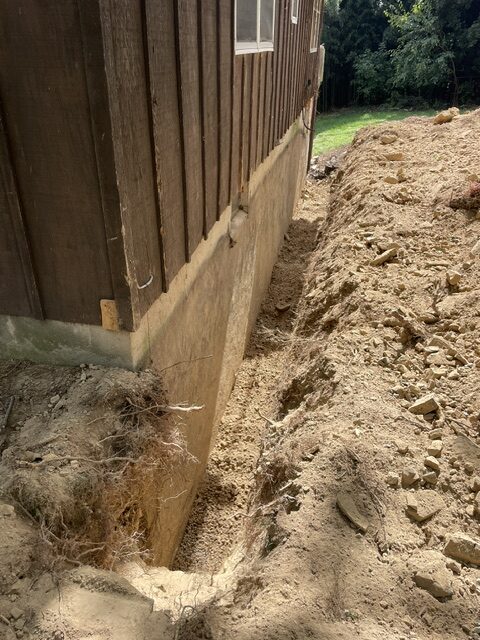
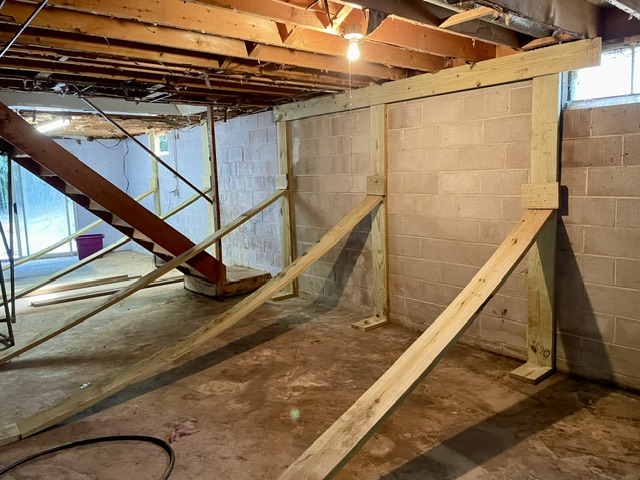
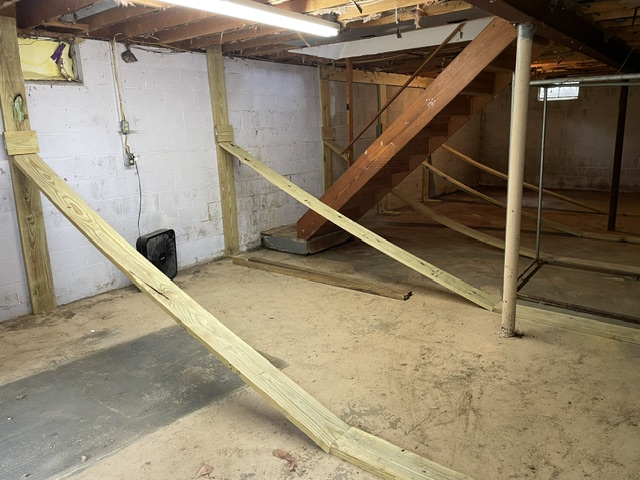
All in all, repairing this foundation crack cost around $10,000 and it delayed our renovation project by roughly two weeks. But things could have been worse as it was still repairable.
No pun intended, the root cause of the issue was a tree root. There were two large trees that were located roughly 25 feet from the rear of the house, which we ultimately took down to protect the structure. One of the trees’ roots had grown toward the house and pressed against the foundation about two feet below ground level. It was a thick root, around four inches in diameter.
Looking back, I don’t know that I could have completely avoided this issue given how packed the basement was, but I certainly could have spent more time trying to get a better look at the walls. It’s a lesson I’ll take with me on every future property walkthrough.
The Takeaway
Give yourself a 10–20% buffer in your rehab budget for unforeseen issues and unexpected repairs. It’s also a good idea to factor in an additional week or so into your renovation timeline for unexpected delays. Be thorough when walking through a property you’re about to purchase, even if you have to do a little digging through a hoarder house to get a better view. The basement is where many of the most expensive problems hide: water intrusion, pest damage, plumbing, electrical, HVAC, and foundation issues. So spend a little extra time there during your walkthrough. It might save you thousands of dollars—and a lot of headaches.
Thanks for reading this week’s Experience, and best of luck in your real estate investing journey!
-BROCK